

Learn how to make pasta at home! This 4-ingredient homemade pasta recipe is easy to make, and it yields chewy, delicious noodles every time.

This homemade pasta recipe is our new favorite cooking project! Lately, Jack and I have been spending even more time than usual in the kitchen, experimenting with bread, baked goods, and even okonomiyaki. But we keep coming back to homemade pasta. It’s super fun to make together, and it only requires a handful of basic ingredients. Of course, the fact that it’s absolutely delicious doesn’t hurt either. 🙂
My homemade pasta recipe refers to the pasta maker attachment for the KitchenAid Stand Mixer, which is how we roll out our fresh pasta at home. If you don’t have a KitchenAid, don’t worry! You could also roll out this pasta dough according to the instructions on a regular pasta maker. However you make it, I hope you try this recipe. It’s an easy, fun way to spend an hour in the kitchen with someone you love, and at the end, you get to eat a big plate of chewy noodles with a perfect al dente bite.

Homemade Pasta Recipe Ingredients
You only need 4 ingredients to make delicious fresh pasta at home, and there’s a good chance you have all of them on hand already:
- All-purpose flour – In the past, I thought you needed 00 flour or semolina flour to make great fresh pasta, but this homemade pasta recipe proved me wrong. In it, regular all-purpose flour yields chewy, bouncy noodles every time.
- Eggs – The key ingredient for adding richness and moisture to the dough!
- Olive oil – Along with the eggs, a splash of olive oil moistens the dough and helps it come together.
- Salt – Add it to the dough and the pasta water for the best flavor.
Find the complete recipe with measurements below.

How to Make Pasta
Ready to learn how to make pasta? Check out this step-by-step guide first, and then find the full recipe at the bottom of this post!
First, make a nest with the flour on a clean work surface. Add the remaining ingredients to the center and use a fork to gently break up the eggs. Try to keep the flour walls intact as best as you can!

Next, use your hands to gently mix in the flour. Continue working the dough to bring it together into a shaggy ball.
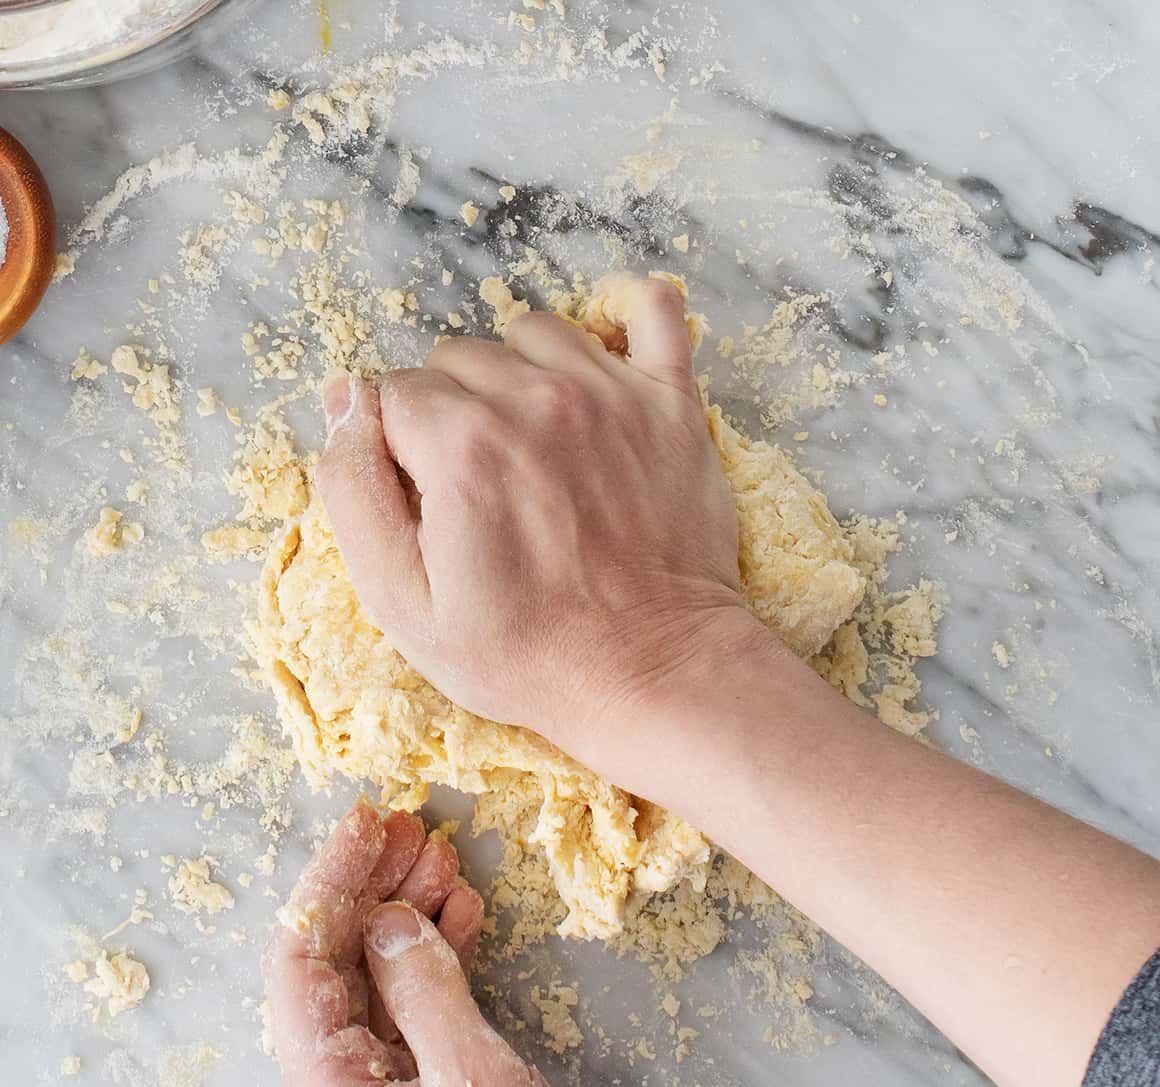
Then, knead! At the beginning, the dough should feel pretty dry, but stick with it! It might not feel like it’s going to come together, but after 8-10 minutes of kneading, it should become cohesive and smooth:

If the dough still seems too dry, sprinkle your fingers with water and continue kneading to incorporate it into the dough. If the dough becomes too sticky, dust more flour onto your work surface.
When the dough comes together, shape it into a ball and wrap it in plastic wrap. Let the dough rest at room temperature for 30 minutes.
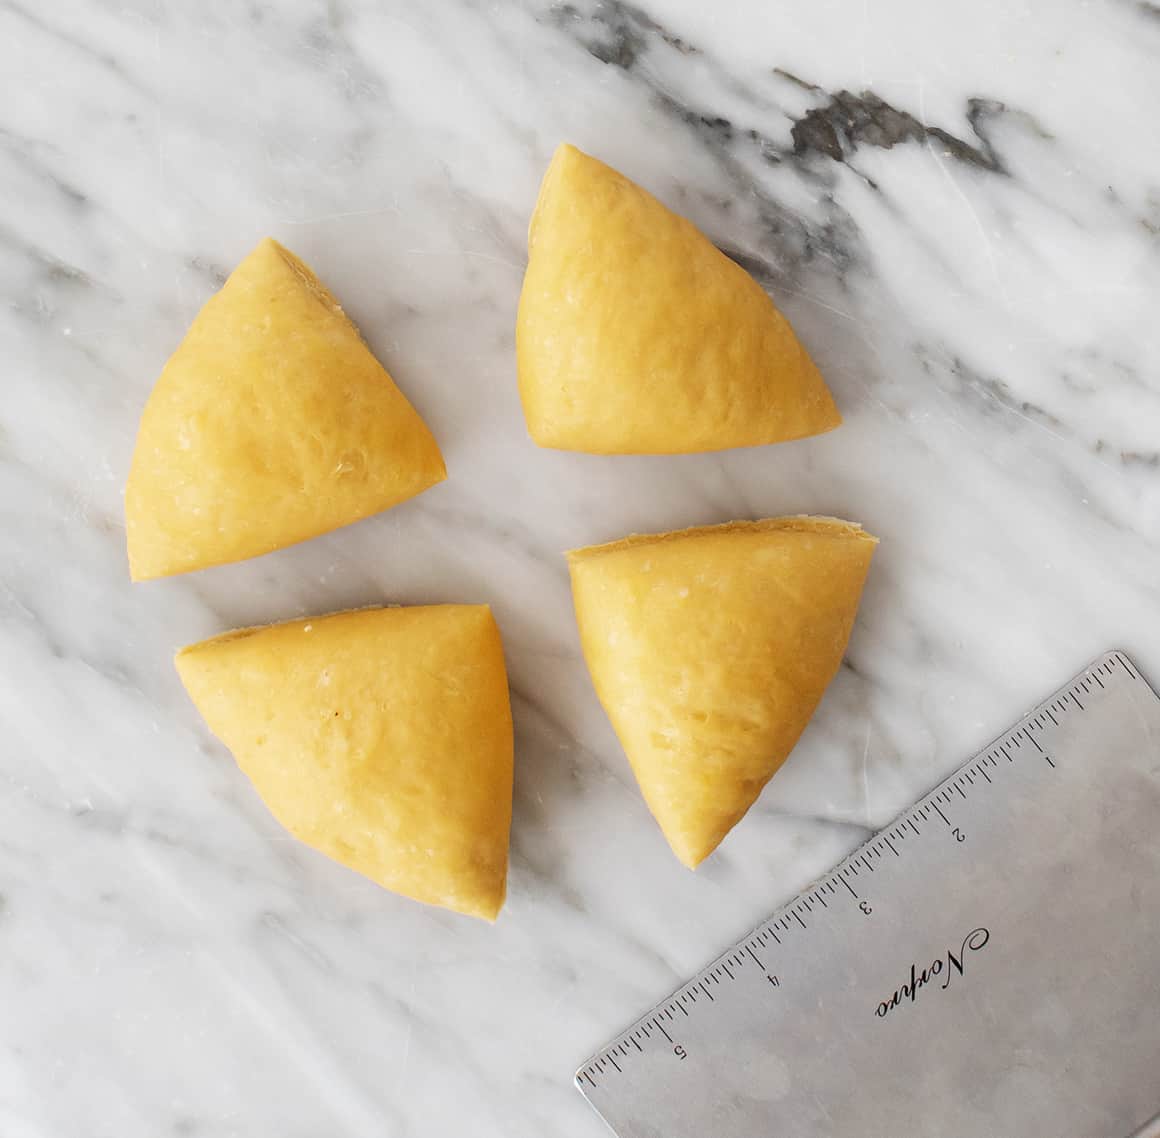
After the dough rests, slice it into 4 pieces.
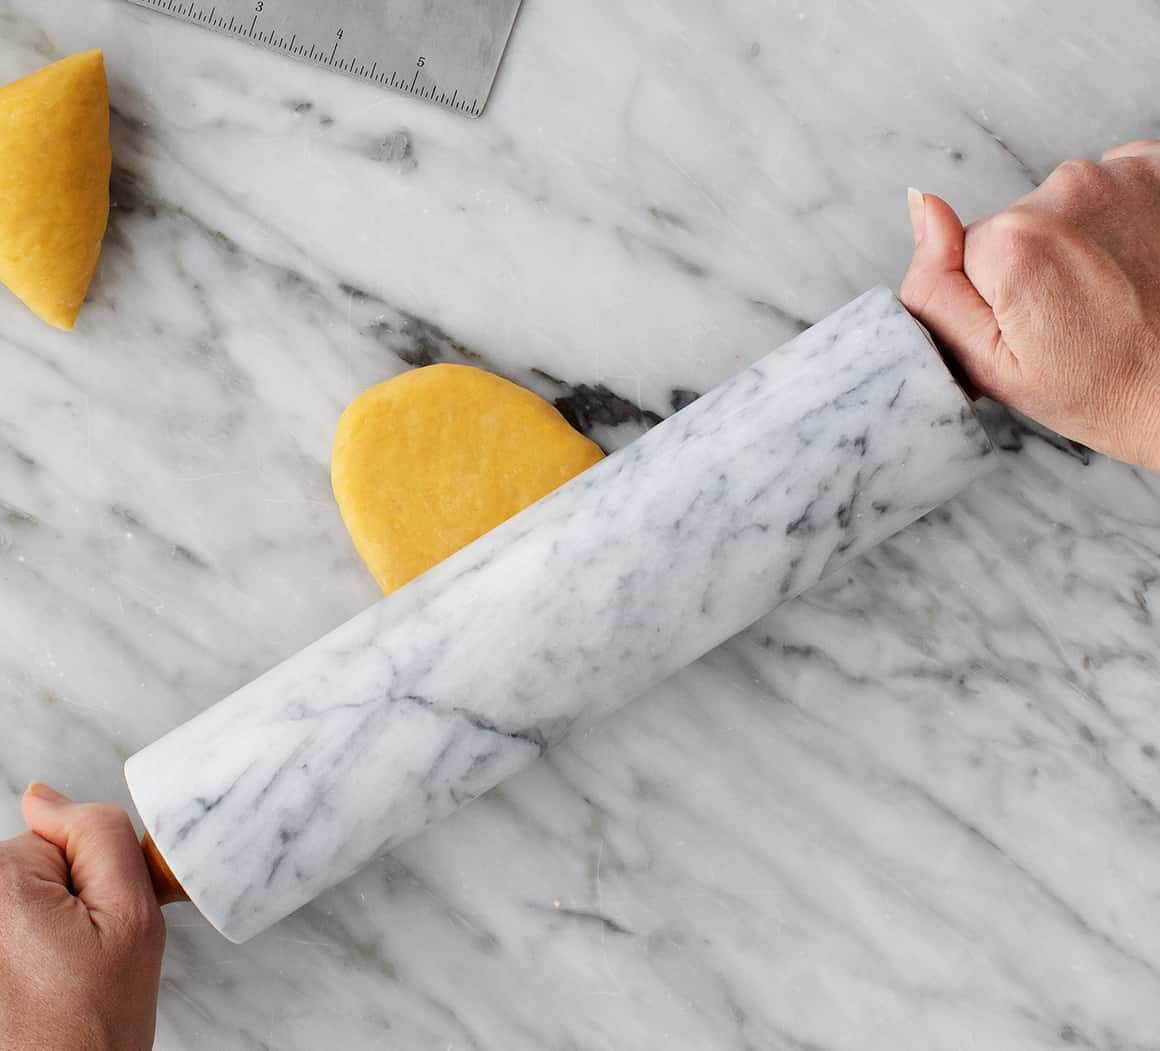
Use a rolling pin or your hands to gently flatten one into an oval disk.

Then, run it through the widest setting of your pasta maker (level 1 on the KitchenAid attachment). I run the dough through the pasta maker 3 times on this setting before proceeding to the next step. If you don’t have the KitchenAid attachment, roll out the dough according to your pasta maker’s instructions.

Next, fold the dough… if you want to. This step is somewhat optional, but it will make your final pasta sheet more rectangular, which will yield more long strands of pasta. Plus, it’s super simple! Just lay the dough flat and fold both short ends in to meet in the center.

Then, fold it in half lengthwise to form a rectangle.

Once you’ve folded the dough, roll it out to your desired thickness. On my KitchenAid attachment, I run it through the pasta roller three times on level 2, three times on level 3, and one time each on levels 4, 5, and 6.
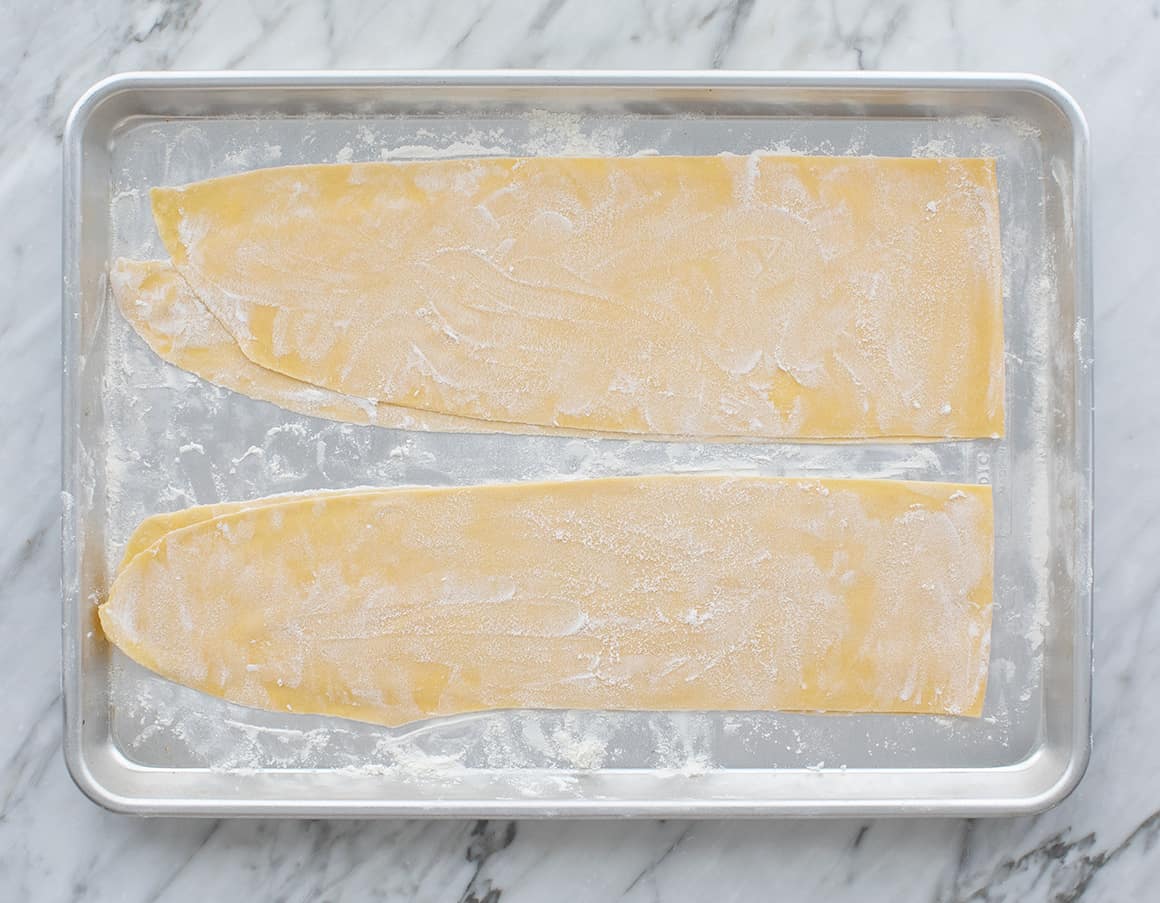
Repeat these steps with the remaining dough pieces. Each time you finish with a piece of dough, lay one half of it on a lightly floured baking sheet. Sprinkle the dough with flour, and fold the other half on top. Sprinkle the top with flour, too!
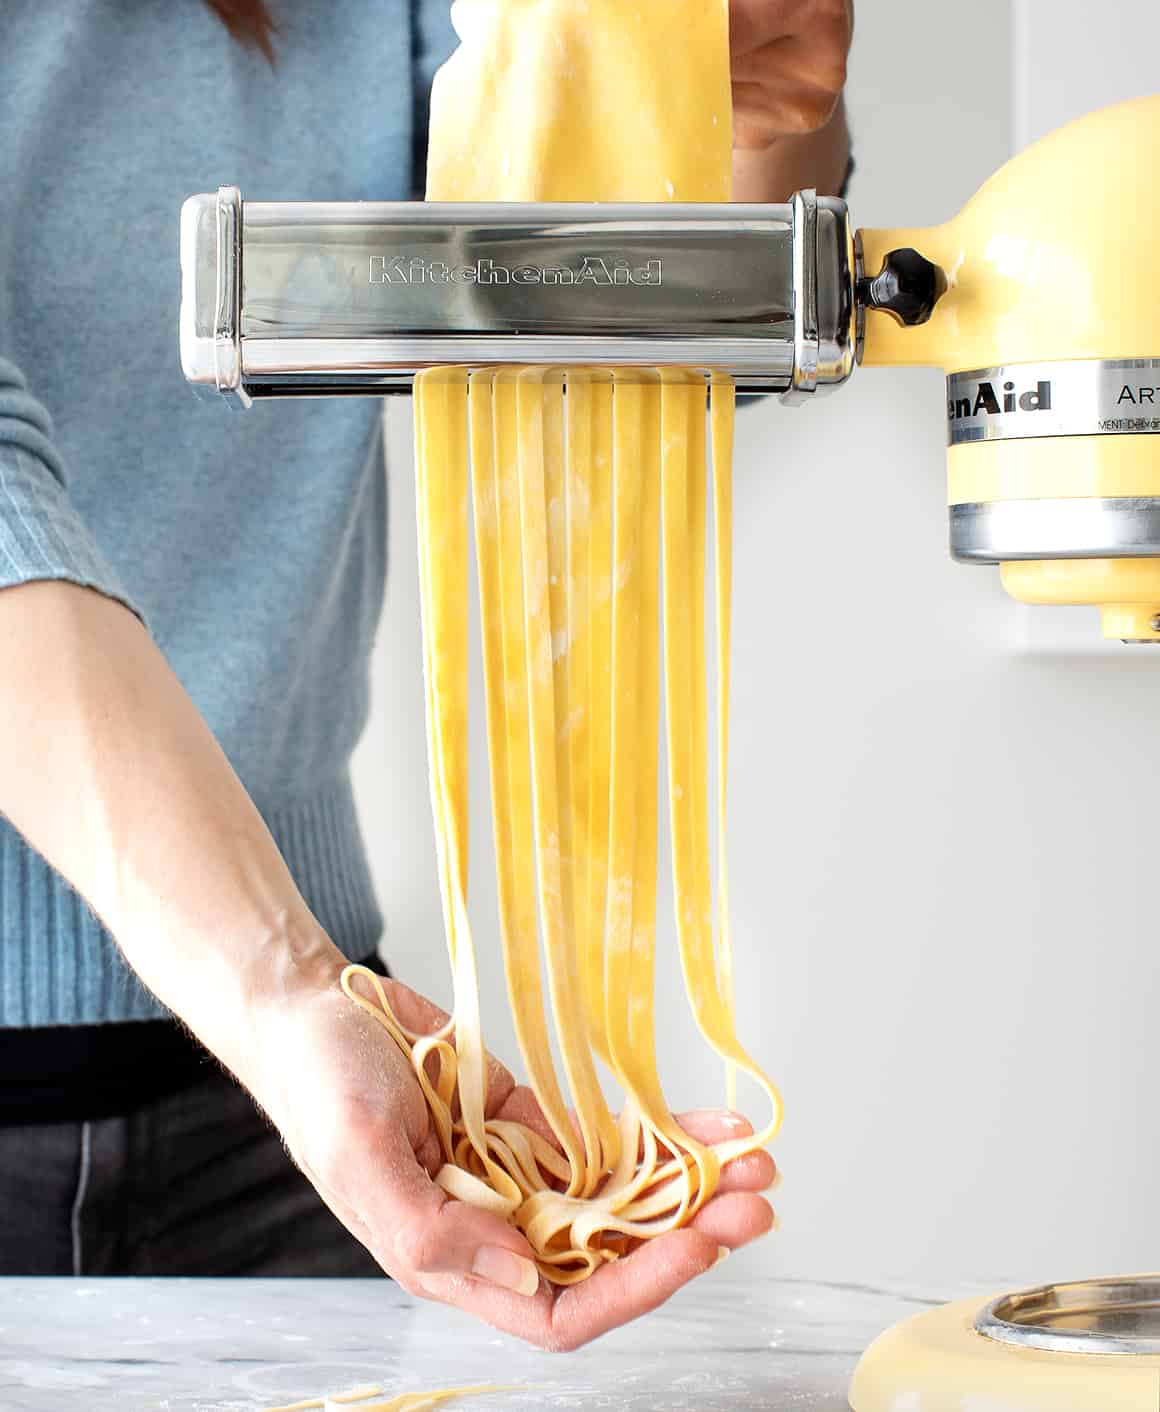
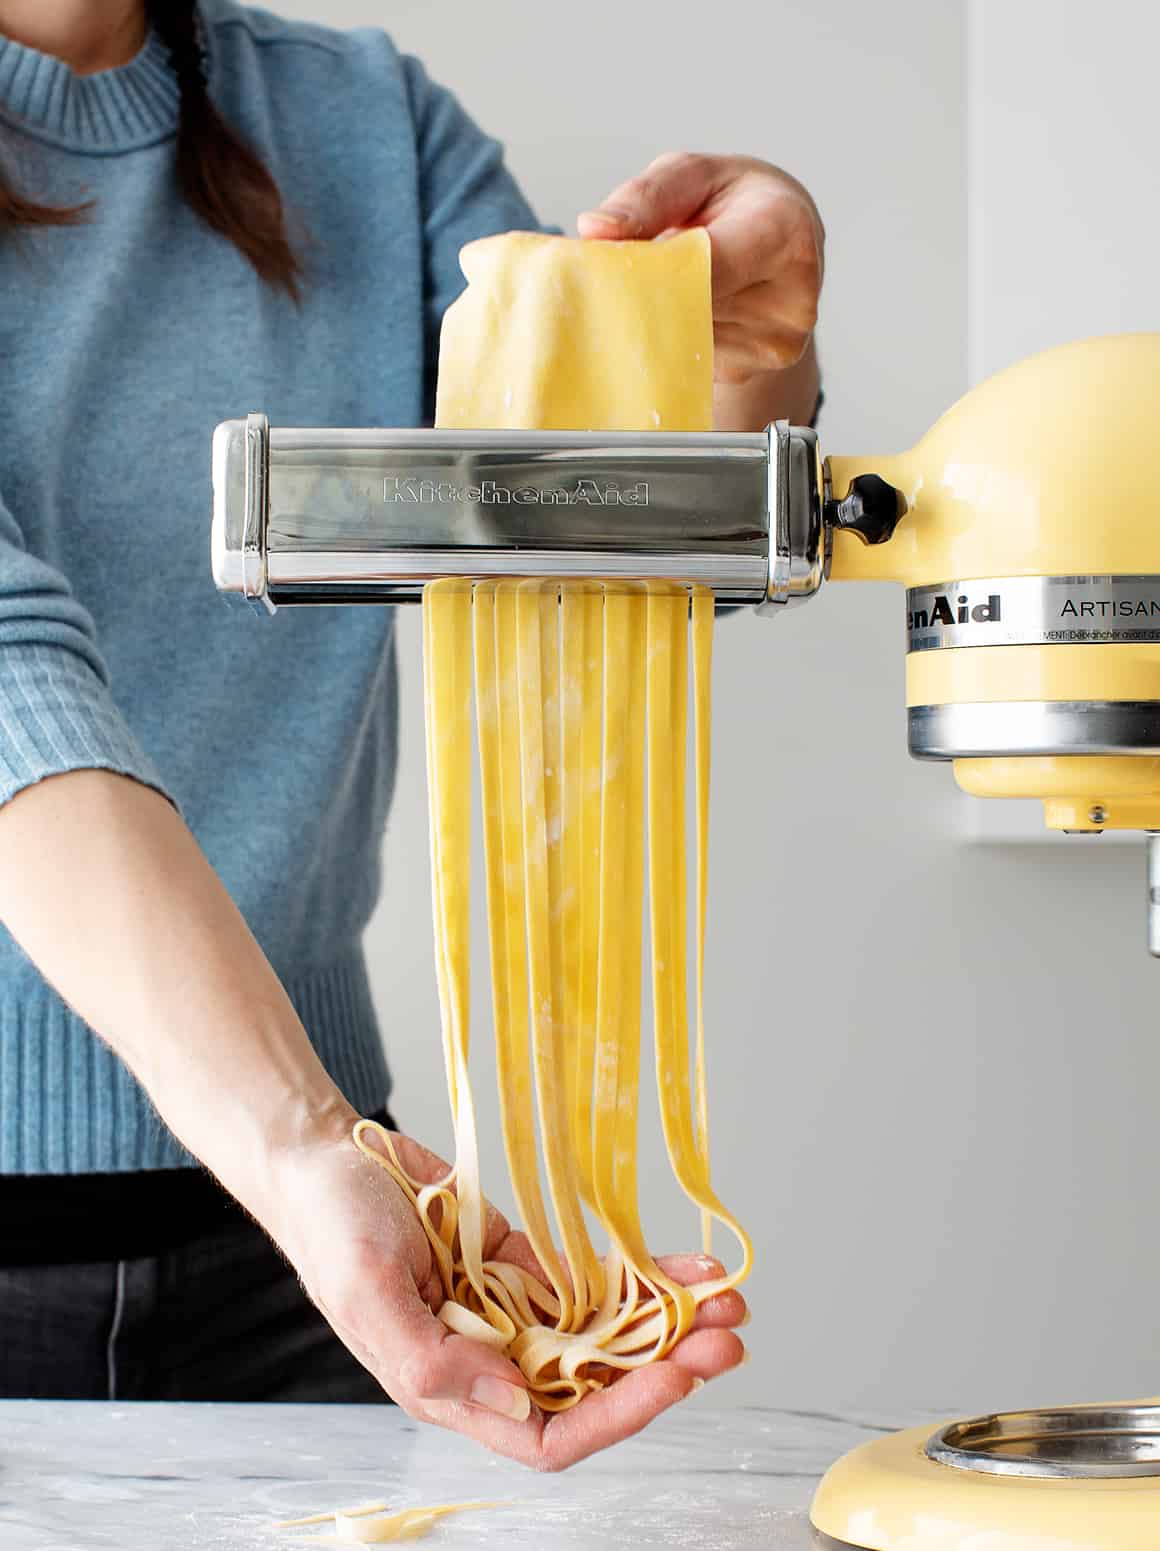
Finally, cut and cook the pasta. Run the pasta sheets through your desired pasta cutter attachment. Cook the noodles in a pot of boiling salted water for 1 minute, and enjoy!
Homemade Pasta Serving Suggestions
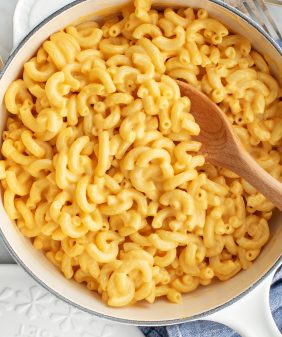
If you’ve never had fresh pasta before, you’re in for a treat! Its chewy, bouncy texture and rich flavor make it so much better than the dried pasta at the store. In fact, these noodles are so good that we usually serve them really simply. They’re fantastic with marinara sauce, pesto, or olive oil and vegan Parmesan or Parmesan cheese.
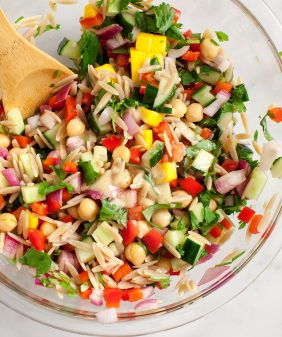
Of course, they’re delicious in larger pasta dishes, too. Use them instead of dried pasta in any of these recipes:
- Tagliatelle with Asparagus & Peas
- Spaghetti Aglio e Olio
- Fettuccine Alfredo
- Easy Pesto Pasta
- Roasted Vegetable Pasta
- Linguine with Lemon and Tomatoes
- Garlic Herb Mushroom Pasta
Find more of my favorite pasta recipes here!


Homemade Pasta
Equipment
- KitchenAid Mixer (the stand mixer to use the pasta attachment)
- Pasta Attachment (my favorite KitchenAid attachment!)
- Baking Sheets (I use these nonstick ones from Nordic Ware)
Ingredients
- 2 cups all-purpose flour, spooned & leveled
- 3 large eggs
- ½ teaspoon sea salt
- ½ tablespoon extra-virgin olive oil
Instructions
- Place the flour on a clean work surface and make a nest. Add the eggs, olive oil, and salt to the center and use a fork to gently break up the eggs, keeping the flour walls intact as best as you can. Use your hands to gently bring the flour inward to incorporate. Continue working the dough with your hands to bring it together into a shaggy ball.
- Knead the dough for 8 to 10 minutes. At the beginning, the dough should feel pretty dry, but stick with it! It might not feel like it’s going to come together, but after 8-10 minutes of kneading, it should become cohesive and smooth. If the dough still seems too dry, sprinkle your fingers with a tiny bit of water to incorporate. If it’s too sticky, dust more flour onto your work surface. Shape the dough into a ball, wrap in plastic wrap, and let rest at room temperature for 30 minutes.
- Dust 2 large baking sheets with flour and set aside.
- Slice the dough into four pieces. Gently flatten one into an oval disk. Run the dough through the Pasta Roller Attachment or a pasta maker three times on level 1 (the widest setting).
- Set the dough piece onto a countertop or work surface. Fold both short ends in to meet in the center, then fold the dough in half to form a rectangle (see photo above).
- Run the dough through the pasta roller three times on level 2, three times on level 3, and one time each on levels 4, 5, and 6.
- Lay half of the pasta sheet onto the floured baking sheet and sprinkle with flour before folding the other half on top. Sprinkle more flour on top of the second half. Every side should be floured so that your final pasta noodles won't stick together.
- Repeat with remaining dough.
- Run the pasta sheets through the Pasta Cutter Attachment (pictured is the fettuccine cutter). Repeat with remaining dough. Cook the pasta in a pot of salted boiling water for 1 to 2 minutes.
Notes
adapted from Serious Eats


I made ravioli with this recipe last night. I have to agree that the flour to moisture ratio seemed off. I ended up adding a little extra water and olive oil to get the dough to come together. It tasted good but not what I was expecting. I’ll keep browsing recipes and methods because it was definitely easier than I thought it would be.
Ive been making this recipe for months. Every single time i add about 1/4 cup-less of water after everything is fully mixed. But this is one of my FAVE recipes
I made this for dinner yesterday and not only did the fettuccini look perfect, it cooked beautifully as well! Just wondering if this recipe works with whole wheat flour as well?
Hi Ashley, I’m so glad you enjoyed the pasta! We haven’t tested this recipe with whole wheat flour. I don’t think a 1:1 sub would work, as the whole wheat flour would require more liquid/eggs. If you’d like to experiment, you could try replacing 1/2 cup of the AP flour with whole wheat. If you try it, let us know how it goes!
What I would like to know is how you stop the flour wall collapsing and the egg/oil running everywhere? 🙂
Crack the eggs into the center of the well then use a fork to whisk the eggs. While whisking your eggs, use your finger to slow push a tiny amount of flour into the center. It will take a few minutes but your eggs will thicken as you keep adding flour. No runny mess!
good
So glad you enjoyed the recipe!
This recipe actually blew my mind. My grandmother gave me her pasta maker and I have tried for years and years to make pasta. It’s come out ok, but I was looking for that color and constancy like Italian restaurants and professional chefs. This recipe is just that— it’s perfect. Followed it to a T. Will use this recipe forever. Thank you so much!
Hi Carla, I’m so glad you loved the pasta!
My husband and I tried cooking this for date night and im excited to say we will never buy pasta again ! It was so yummy. Can you share how to safely dry or freeze to save for later?
Can this recipe be dried? To store longer?
I’ve tried a few different pasta recipes in the past, but once I had found this one, it’s the only one I’ve used since! I’ve now used this recipe so many times, for perfect pasta every time (even if I halve the recipe if cooking for one). Thanks so much for sharing.
Love the recipe very easy and simple to make can’t wait to make other pasta meallasagna ravioli and morethank you
Absolutely perfect! First time, your directions were so easy to follow and I had success first time!
Hi Danielle, amazing! So glad you enjoyed the pasta.
I have made this recipe 3 times now, and it’s flawless each time.
I have a essential tremors and find a very difficult to kneed the dough myself so I do that part In my kitchenaid mixer. and it works just fine. Thank you for your lovely recipe.
It turned out perfect! This was our first attempt and we are impressed with how easy it was (after we figured out that we needed two sets of hands to crank the machine and catch the pasta). So much fun! Thank you!
Hi Michelle, I’m so glad you loved the recipe! 2 sets of hands can make such a difference 🙂
How long do you cook it for?
Omg this is the best recipe I’ve tried 10\10!
Hi Chloe, so glad you loved it!
My wife just purchased a pasta machine for my birthday. I used it for the first time yesterday. I made shrimp fettuccine and wow it was great. I will never buy pasta again. Home made or nothing.
How much pasta does this recipe make approx.? I would like to make about 2lbs
Hi Kristen, Great question! I’m not sure of the exact yield of this recipe in pounds, but it typically serves 3 to 4. My guess is that it’s under 2lbs, so you might want to scale up the recipe.
I just made this recipe and it weighed in at 1lb 2oz. So I’d say about 3 healthy servings is about right.
Made this today and it turned out great. Very easy recipe to follow and no issues! Made lasagna and with the extra dough made some fettuccine!!
Hi Julie, I’m so glad you loved the pasta!
I’ve made this recipe probably 10x and have never have any issues! I do however use my stand mixer to knead and mix. But it’s a winner in my house every time! I doubled the recipe today so I can dry half and have it on hand for our next pasta day!
I’m glad your family has loved it!
This is the second time I have made this pasta and IT. IS. TO. DIE. FOR!!! One thing I learned in the process – this is NOT like kneading bread dough – I had to get really serious with it. I mean, I had to show it who was the BOSS (for a while there I started to think it was going to win…then the magic happened and it all came together. BTW, Great time to get out all of those frustrations for sure!) Anyway, I’ve never made homemade pasta before and I couldn’t believe the difference in flavor and texture. I seriously could not stop thinking about it and couldn’t wait to make it again. We made two batches this time, each working on a single batch to make it manageable. Thank you so much for this recipe…we LOVE it!
Ha ha, I’m so glad you loved it, great description of the process too 🙂
After 25 minutes of us taking turns trying to get the stuff to form a ball, we gave up. We measured ingredients again and had same results. Two hours and six eggs late, we gave up.
I just made a double batch and didn’t have the same issues, but I have before. I think the key to me is the gradual incorporation of the flour into the middle. Then, once it is the shaggy dough it is a real workout to push and fold, push and fold for 10 minutes. My dough is smooth and nice. Last weekend when I made this, the single recipe I made never got so nice and was dried out. I think it was because I added the flour too quickly too soon to the egg, salt, and oil mixture. The second batch after the first one was perfect. And now this weekend both batches worked just fine. Good luck!
I had a similar issue, so I added a teaspoon or two of water and it came together just fine after that.
I think the thing to remember is that the measurement of “3 large eggs” is not precise since rarely are two eggs the same size so you will have to adjust the available liquid (with a small amount of water or another egg yolk for richer pasta) in order for the dough to become smooth. My daughter and I each made a batch side by side and we had to add more water to hers. I have also experimented with just sprinkling about a 1/2 tsp of water on top after kneading before covering in plastic and letting it test for a couple hours which also worked with less kneading effort. If the dough is too dry when rolling, I find that it tears along the edges so i just sprinkle a few drops onto the sheet, for it a few times, then start rolling it from the beginning which also works well.
An excellent recipe and set of instructions L&L!
If I want to double the batch do I just double the ingredients? I know that doesn’t always work
Hi Chris, you could double the ingredients – you’ll just have a larger dough ball to roll but it should be fine.
For me, these tips from L&L are key…
“If the dough still seems too dry, sprinkle your fingers with water and continue kneading to incorporate it into the dough. If the dough becomes too sticky, dust more flour onto your work surface.”
My notes: after making this once or twice. You will know by look and feel what is “too dry” or “too sticky” but for your first time you may find the following tips helpful: for me, too dry = anything from crumbly texture after 10 minutes of vigorous kneading (really dry) to edges tearing during rolling (just barely too dry). Too sticky = dough still clumping on your hands after 10 minutes of vigorous kneading (really wet) to dough sticking to rollers during rolling (just barely too sticky).
I hope this helps anyone trying this for the first time!
Hi Steve, thank you for these extra helpful tips!
Super easy recipe to follow. Mine came out more like top ramen tho. Did I do something wrong?