

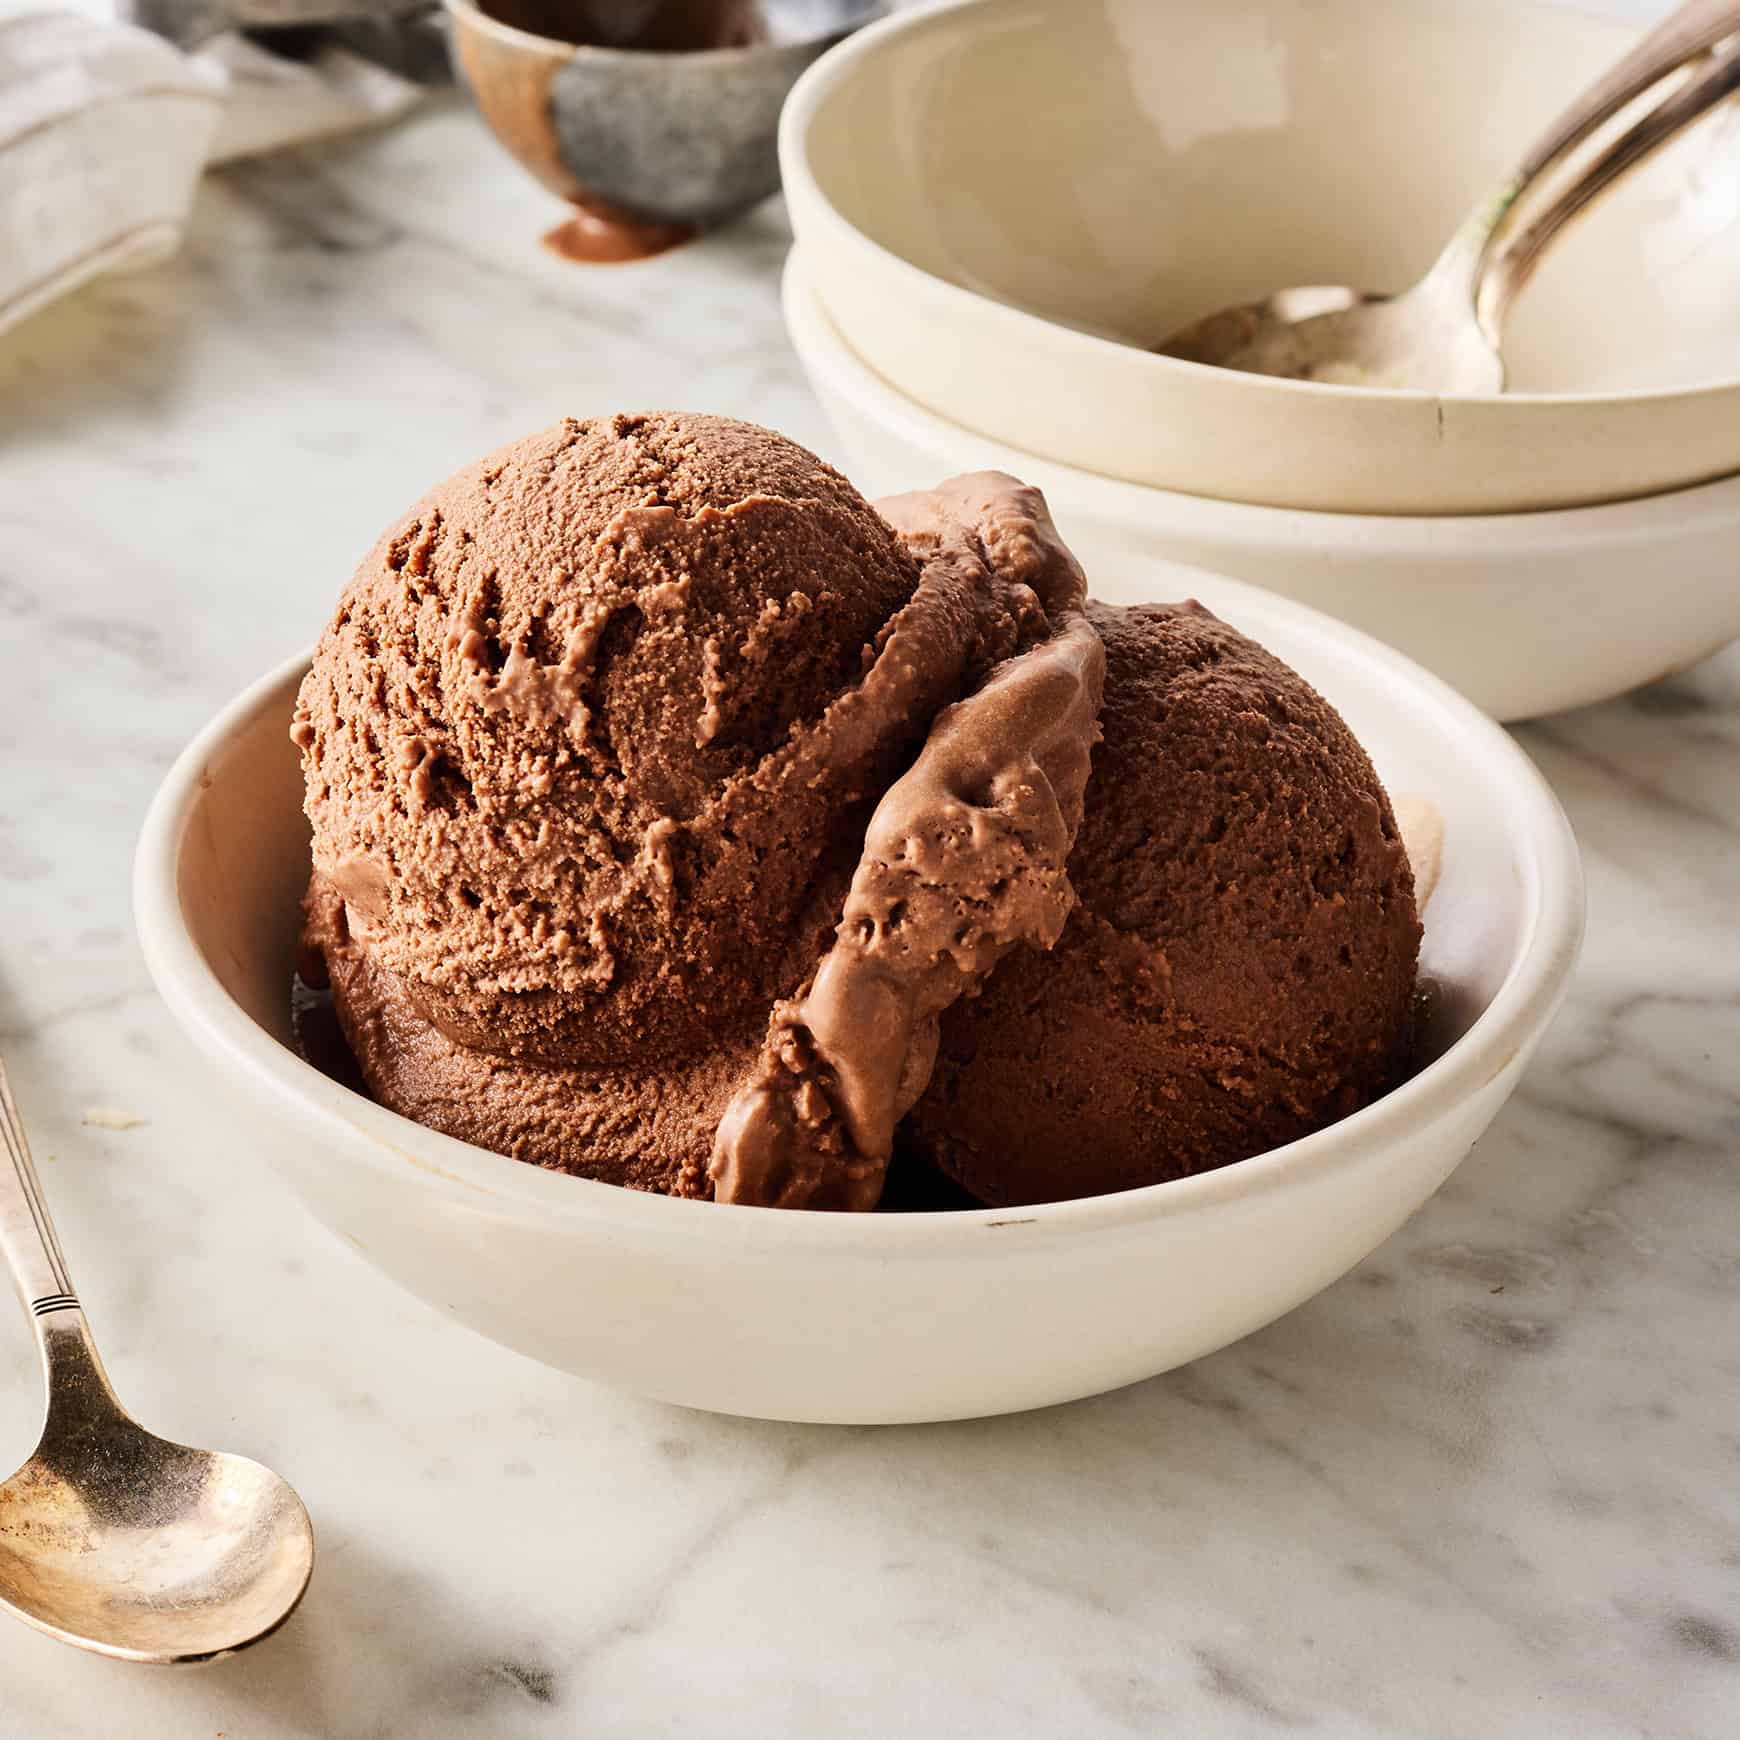
Love chocolate? Love ice cream? You HAVE to try this homemade chocolate ice cream recipe! It has a smooth, creamy texture and rich chocolate flavor.

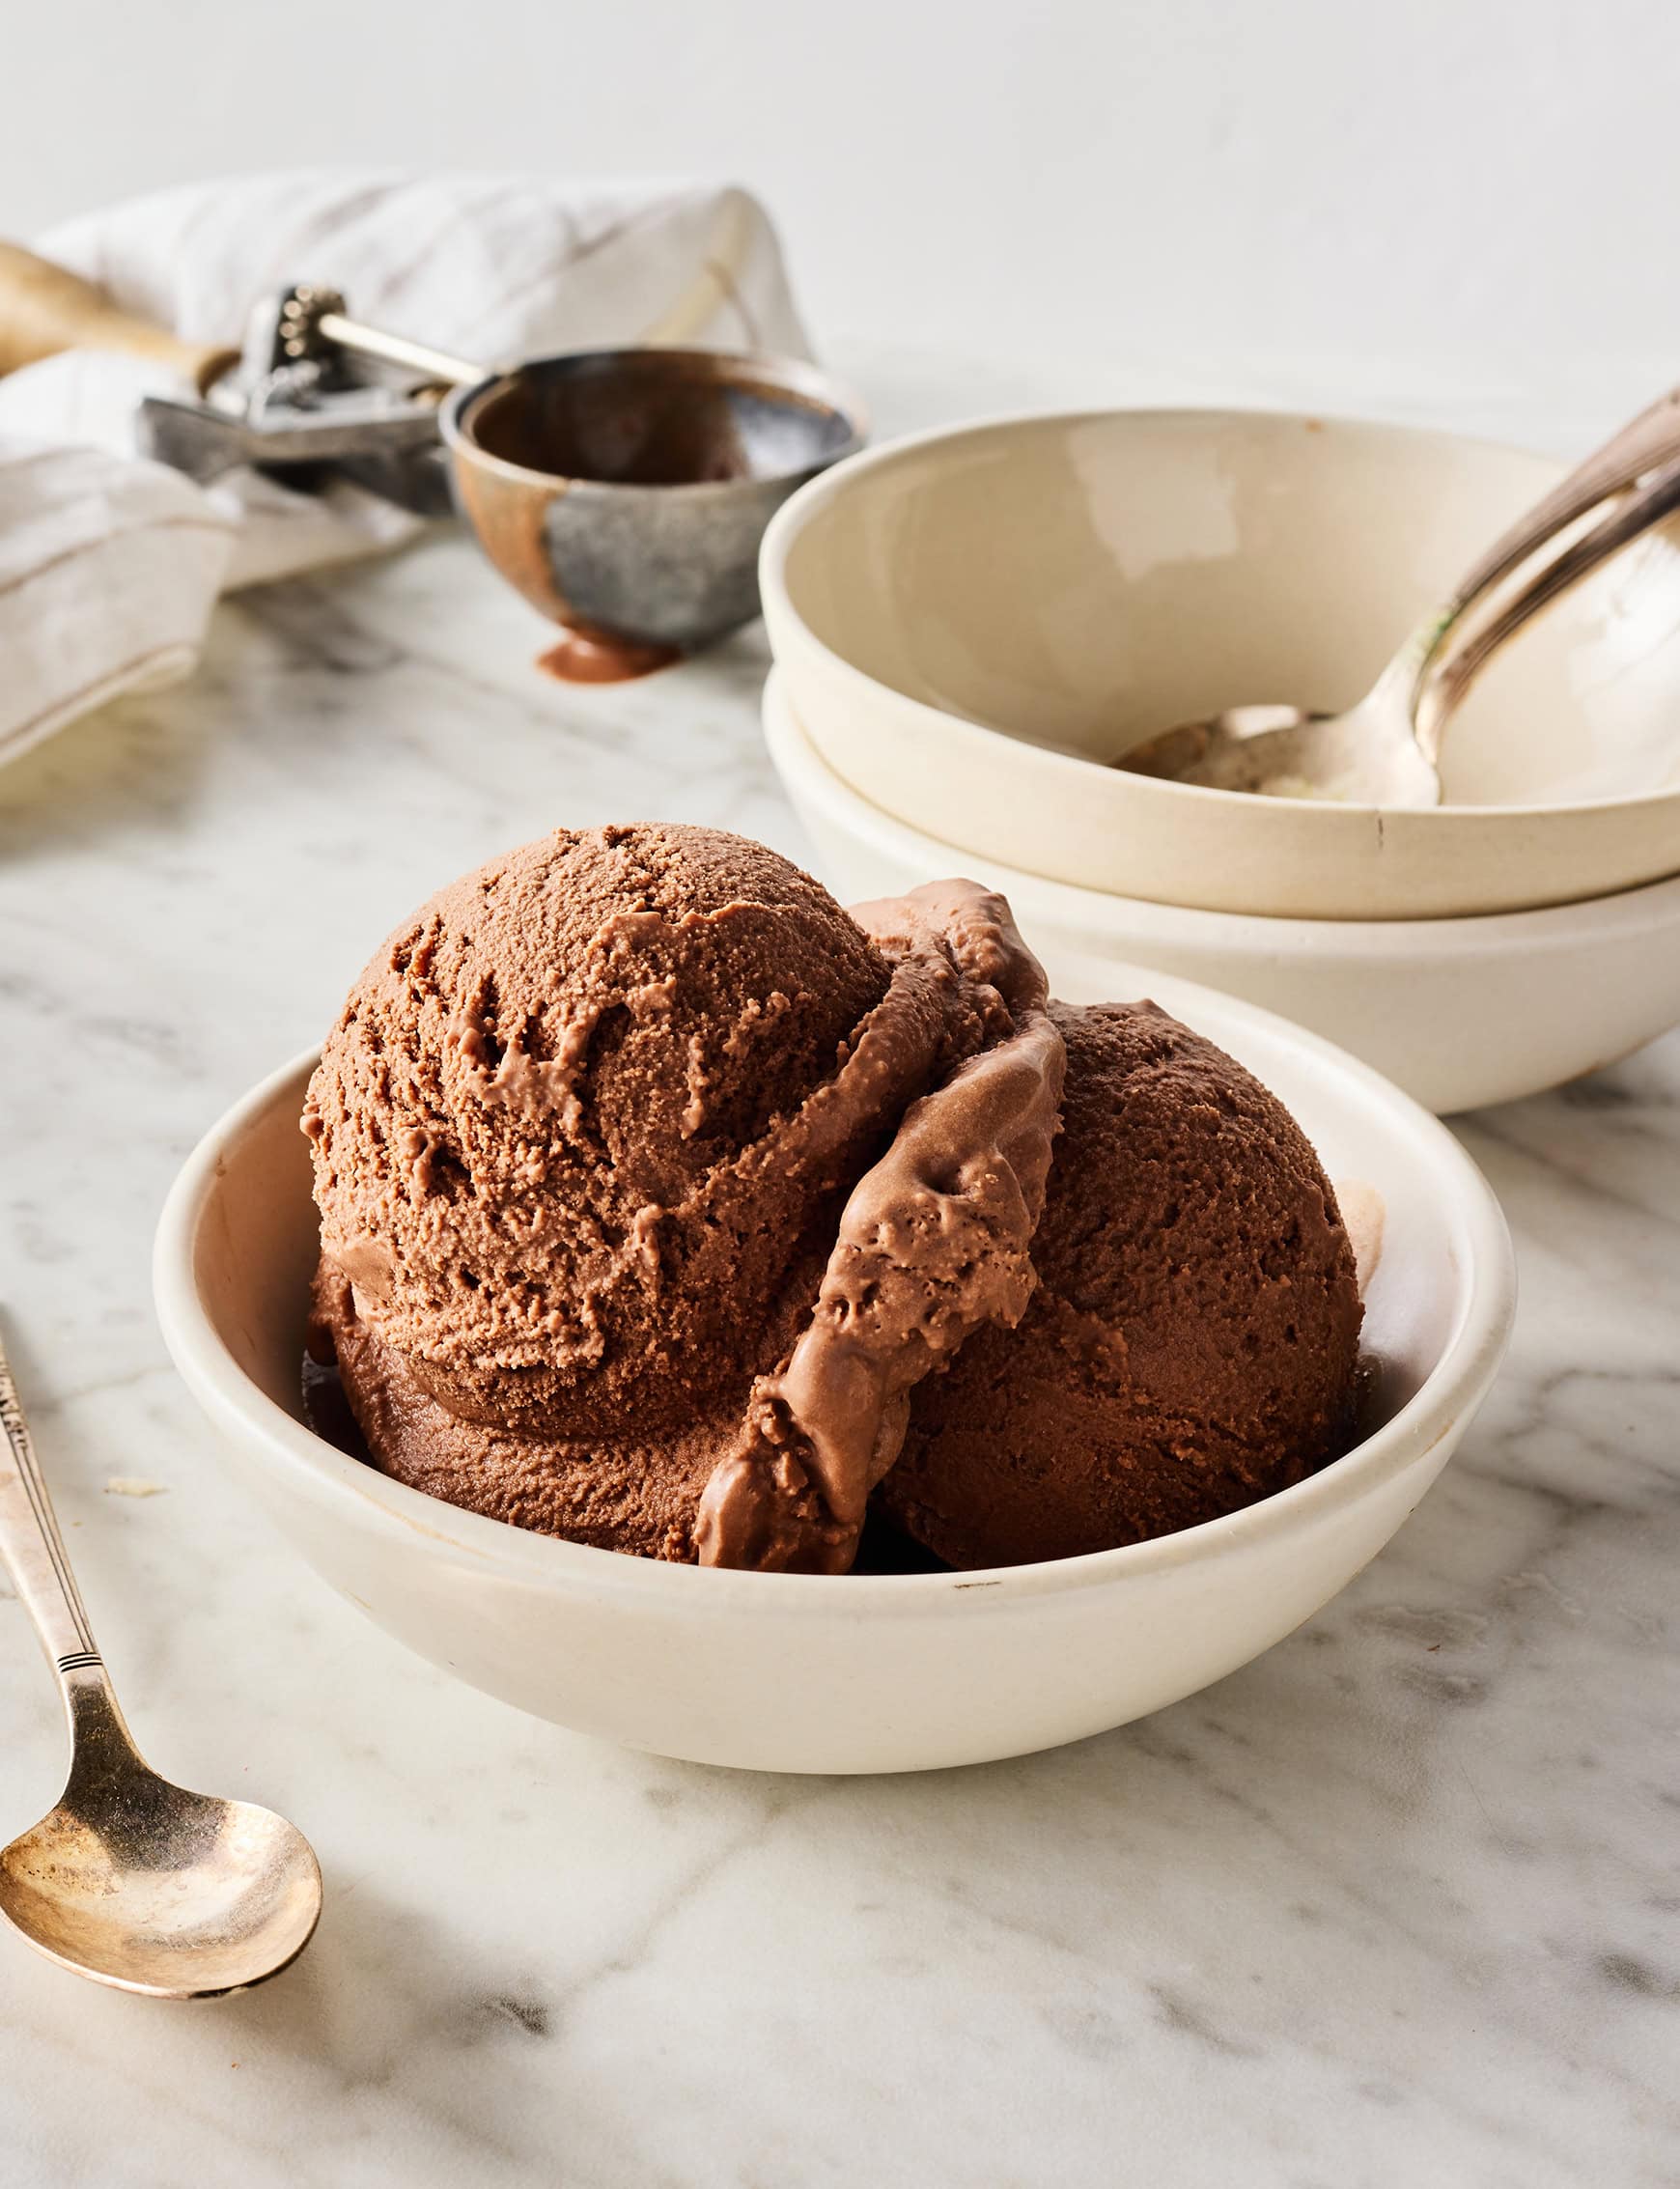
Warning: this chocolate ice cream recipe is insanely delicious. If you try it once, there’s a good chance you’ll have it on repeat all summer long!
I shared this vanilla ice cream recipe a few years ago, and it’s become SO popular that I knew I had to share a chocolate version too.
After lots of testing and tweaking (read: eating lots of chocolate ice cream), I’m happy to report that this recipe makes some of the best chocolate ice cream I’ve ever tasted, homemade or otherwise. It’s luxuriously creamy and super chocolatey. I’ve eaten it straight out of my ice cream maker on more than one occasion…oops. 🙂
This recipe is easy to make with 7 basic ingredients, but I want to give you a heads up that it takes some time. You need to freeze the bowl of your ice cream maker for at least 12 hours before making it, and you’ll also need to let the chocolate mixture chill fully before churning. Trust me though—it’s worth the wait!
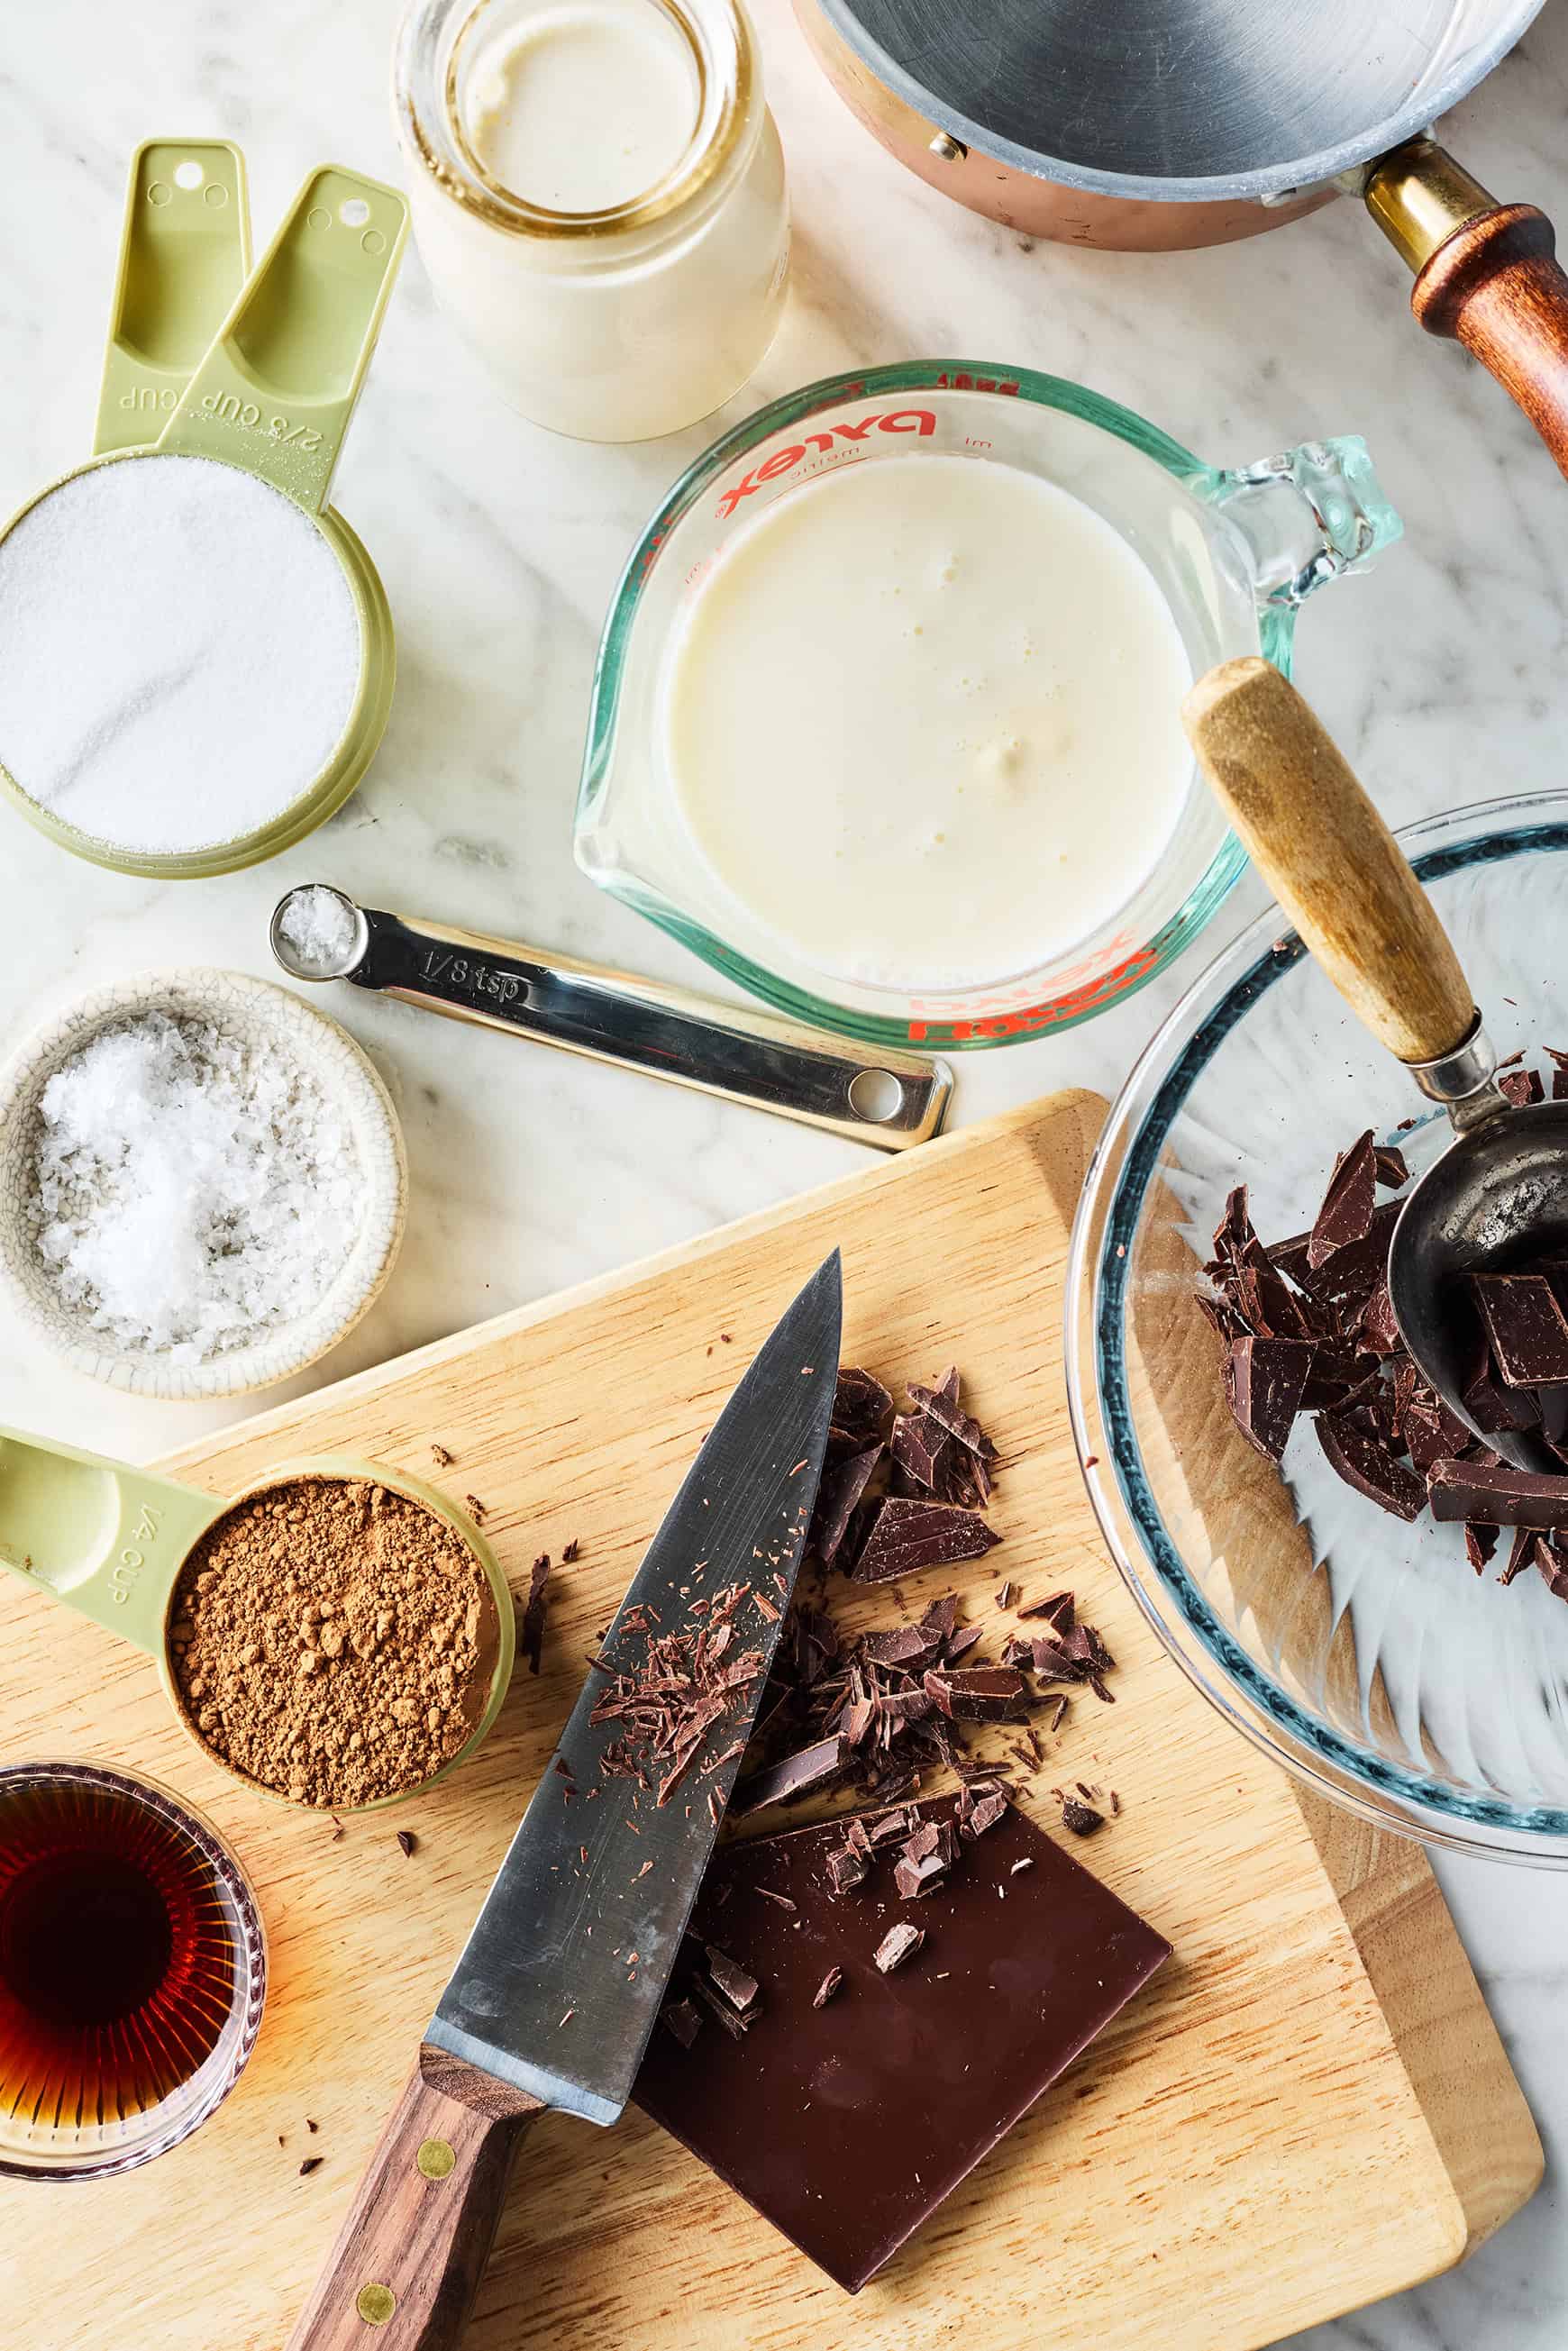
Chocolate Ice Cream Ingredients
There are essentially two main ways to make homemade ice cream:
- With a custard base, using eggs or egg yolks to thicken the ice cream
- Without eggs (also called Philadelphia-style), with a simple cream base
This recipe is for Philadelphia-style chocolate ice cream, meaning that you don’t need eggs to make it. I love this method because it’s simpler to prepare and doesn’t have any eggy flavor. Just pure chocolate here!
Here’s what you’ll need to make it:
- Heavy cream and whole milk – They create the rich, creamy base. I don’t recommend substituting reduced fat or skim milk for the whole milk. Whole milk’s higher fat content ensures that this ice cream comes out creamy, not icy.
- Unsweetened cocoa powder and chopped dark chocolate – Yes, there are TWO kinds of chocolate in this recipe! Both contribute to its deep chocolate flavor. The chopped chocolate also gives it a denser, creamier texture, which I love. Seek out a high-quality bar with 70% to 85% cacao. Tip: You can use any unsweetened cocoa powder in this recipe, but Dutch-process cocoa powder will give it an especially rich chocolate flavor.
- Sugar – For sweetness. Natural cane sugar and fine granulated sugar both work well here.
- Vanilla extract – For warm depth of flavor.
- And sea salt – To make the chocolate flavor pop!
Find the complete recipe with measurements below.
How to Make Chocolate Ice Cream
IMPORTANT NOTE: You need to freeze the bowl of your ice cream maker for at least 12 hours before making this recipe. This step is essential for helping the ice cream mixture freeze as it churns. So if your ice cream maker’s bowl isn’t already in your freezer, head to your kitchen right now and freeze it!
Once it’s freezing, you can make this chocolate ice cream recipe by completing these 3 steps:
1. Make the chocolate ice cream base
First, you’ll simmer the cream with the sugar, cocoa powder, and salt. This will fully incorporate the sugar and cocoa powder with the cream, giving the ice cream a smooth texture.
Then, you’ll remove the cream mixture from the heat and stir in the chopped chocolate. Whisk until it melts into the cream and the mixture is smooth, then whisk in the milk and vanilla.
- Why add these ingredients after simmering? If you added them earlier, along with the cream, the chocolate could split, giving the ice cream a grainy texture.
Next, chill the ice cream mixture. Transfer it to a heatproof bowl and allow to cool slightly. Then, cover and chill in the refrigerator for at least 2 hours or overnight.
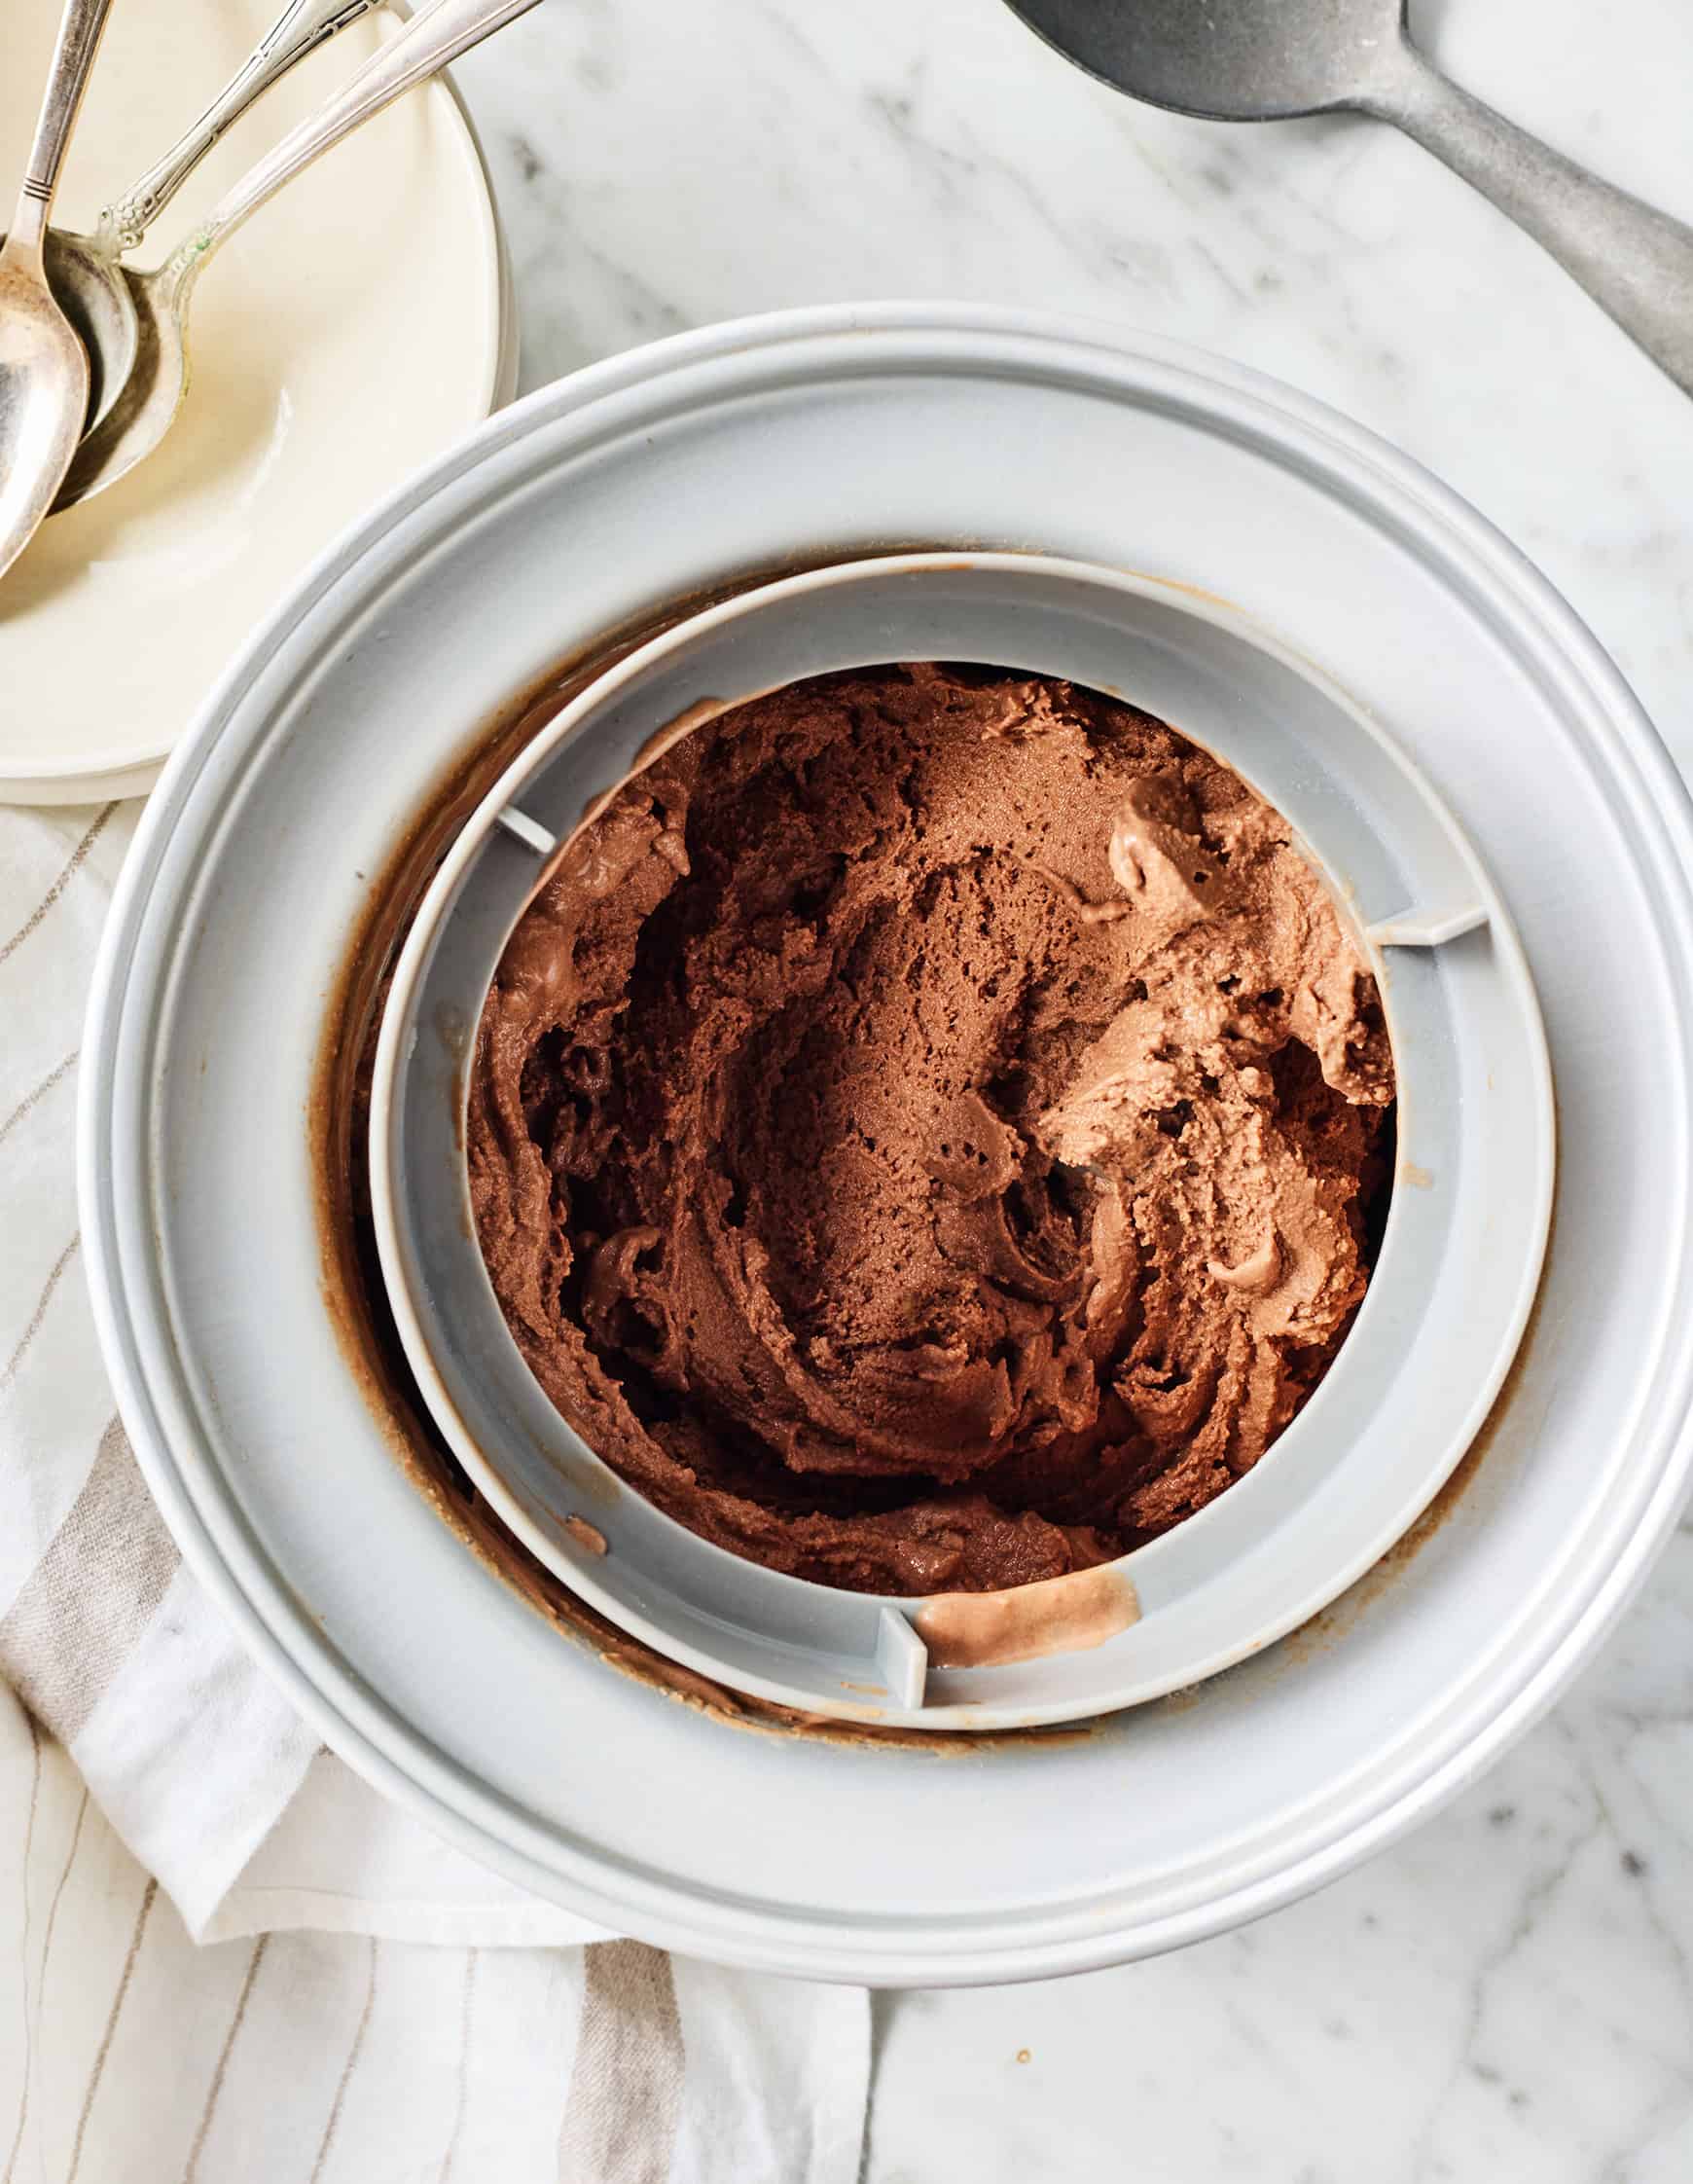
2. Churn the ice cream
When you’re ready to churn the ice cream, remove the chilled chocolate mixture from the fridge.
- FYI: A skin might have formed on top. That’s ok! Give the mixture a good whisk, and the skin should incorporate back into it.
Churn the chocolate mixture in your ice cream maker according to the manufacturer’s instructions. I use the KitchenAid stand mixer ice cream maker attachment (it’s the best!), and I typically churn the ice cream for 20 to 30 minutes. Generally, the longer you chill the chocolate mixture in the fridge, the less time you need to churn it.
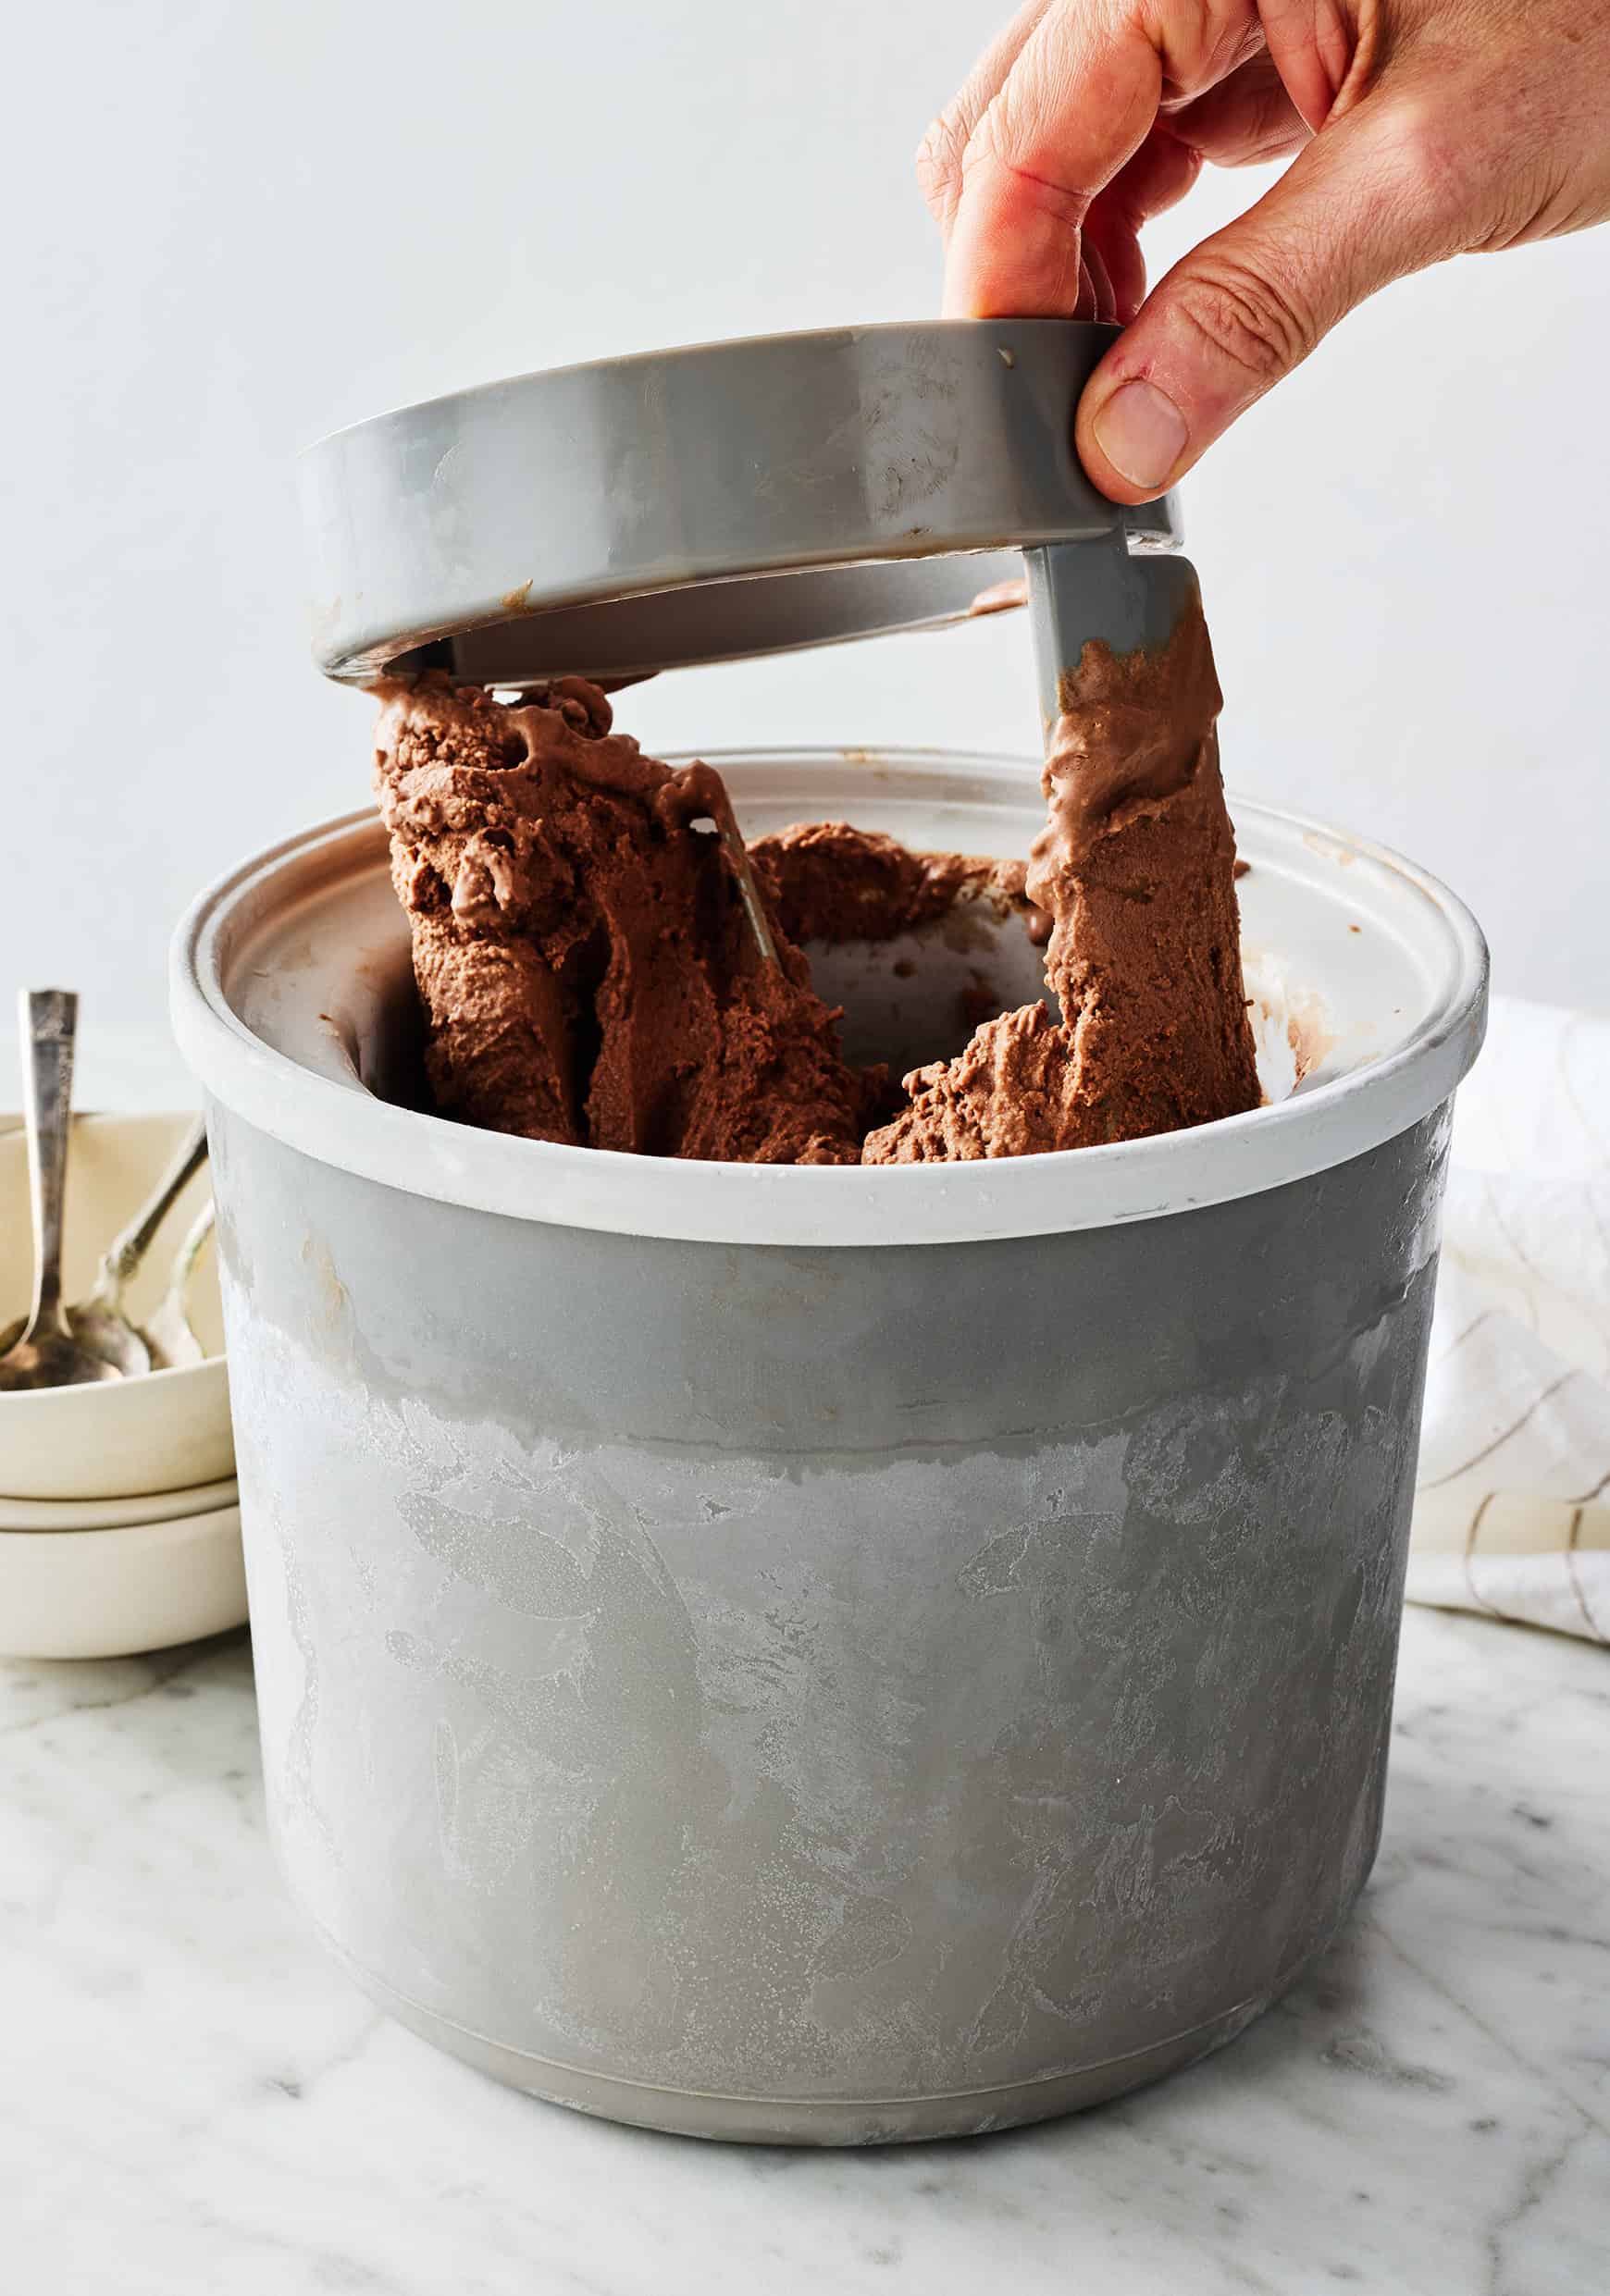
3. Freeze
You can eat the ice cream right after churning, but know that it will have a fairly soft texture. For a firmer, scoopable texture, transfer it to an airtight container and freeze for 2 hours or longer.
How to Store
This homemade chocolate ice cream keeps well in an airtight container in the freezer for up to 1 month.
It might be too firm to scoop directly from the freezer. Let it sit at room temperature for a few minutes to soften, or let it soften more gradually in the fridge. I also find that dipping my ice cream scoop in warm water helps it scoop more easily.
Enjoy plain or topped with chocolate shavings, sprinkles, whipped cream, strawberries…anything you like!

Homemade Chocolate Ice Cream
Ingredients
- 1½ cups heavy cream
- ¼ cup unsweetened cocoa powder
- ⅔ cup cane sugar
- ⅛ teaspoon sea salt
- 3 ounces dark chocolate, 70% to 85% cacao, chopped (about ½ cup)
- 1½ cups whole milk
- 2 teaspoons vanilla extract
Instructions
- In a medium saucepan, whisk together the cream, cocoa powder, sugar, and salt. Bring to a gentle boil, whisking occasionally, then reduce the heat and simmer for 30 seconds.
- Remove from the heat and add the chopped chocolate. Whisk until smooth, then whisk in the milk and vanilla.
- Pour into a heatproof bowl and let cool to room temperature. Cover and chill in the refrigerator for at least 2 hours or overnight.
- Remove the chilled chocolate ice cream base from the fridge and whisk well. Churn in an ice cream maker according to the manufacturer’s instructions, typically 20 to 30 minutes. The ice cream will be soft after churning. For firmer ice cream, transfer to an airtight container and freeze for 2 to 4 hours before serving.
- Store in an airtight container in the freezer for up to a month. If the ice cream is too firm to scoop straight from the freezer, let sit at room temperature for a few minutes to soften.


Awesome flavor and texture; however, after leaving in the freezer for a few hours, it got so hard it was quite difficult to scoop out. I’ve read this can be due to fat content vs alcohol. But any other ideas why this may have occurred? Has it ever happened to you- with this recipe or another homemade ice cream recipe? Only deviations: I used 2cups heavy cream and only 1cup milk, only 1/2 cup sugar instead of 2/3 cup. Appreciate any advice you might have. Thanks again for the amazing recipe!
I have made this twice this summer and my husband and I voted it the best we’ve made, creamy and rich chocolate flavor. Will definitely be making regularly.
Hi Cathy, I’m so glad you love it!
Hi! Is there anyway I could use 1/2 cup of cacao powder instead of chopped cacao and how can i substitute the cocoa powder out? Add a little more cacao powder? Thank you!
I made this substituting whole fat oat milk for the dairy. I cut back the sugar by a bit and substituted a teaspoon of instant coffee for a teaspoon of vanilla. It is delicious! My family can’t have dairy and this will be our go to ice cream recipe.
This recipe turned out amazing, so creamy and full of deep chocolate flavor. It was fun to make and, honestly, better than most store-bought ones I’ve tried. While I was enjoying this, I gave my dog a frozen treat from Frostreats. It’s not just a powder mix like most options out there, but actual ice cream made specially for dogs with real ingredients. A nice treat for both of us.
This ice cream tasted very nice, but the texture of my ice cream was more icy and grainy. This could be my own fault considering it was my first time making ice cream, but I think the chocolate chips I added (Enjoy Life dark chocolate chips) may have also been part of the problem.
Hi Ginger, I think those chocolate chips would work here! Did you use whole milk and heavy cream—not a plant-based or lowfat milk? And did the chocolate chips melt completely into the cream mixture? Those are my first couple thoughts for troubleshooting the texture.
Sounds delicious and I like no egg.
However, I don’t have an ice cream maker. I do have a vitamix! Should I make one stove then fill ice cube containers and freeze. Then throw in my vitamix on ice cream? I’m looking for a good chocolate ice cream recipe. Thanks got your help!
Maybe use chocolate pudding mix?
Hi, I haven’t tried the ice cube tray method, but I think it could work!
Thnq so much for this reciepe .it is very delicious and i feel relief after eat this
What an amazing chocolate ice cream recipe. It is so basic but really the only flavor I need to make me happy! This recipe turned out just right- so creamy and chocolately.
This chocolate ice cream recipe is a dream — so rich and velvety! I’ve been exploring some quick dessert options lately and found a great place for cool treats and frozen desserts that pair well with homemade goodies like this.
good to have a tested ice cream recipe! thank you, nice set of ingredients, works, for me
ah darn, I was making rocky road ice cream last night when my trusty machine hiccuped and died. now a great recipe for more ice cream in the in box this am. so unfair. I be searching for the stand maker version thanks to your e-mail.
Can the chocolate ice cream be made without an ice cream machine?
Hi Dianne, no, this one requires an ice cream maker.
Very rich and delicious! I didn’t have dark chocolate, so I subbed semi-sweet chocolate chips. SO good. I’m going to be making this all summer! Thank you for posting exactly what I was looking for.